How to take a blood sample for a home test
Getting tested for STIs can be very stressful, and the idea of doing it at home, while for some may be more convenient than going to a clinic, can introduce some uncertainty.
Because of this uncertainty, some people struggle with collecting a blood sample at home.
If you’re using a Better2Know Home Test Kit, here’s a step-by-step guide for taking your own blood sample.
Get tested for STIs from the comfort of your own home.
What’s included in my home test?
When you order a test or screen that requires a blood test, you will receive a Better2Know Home Sample Collection Kit (Blood Sample). Your kit will contain:
- Three finger prick lancets
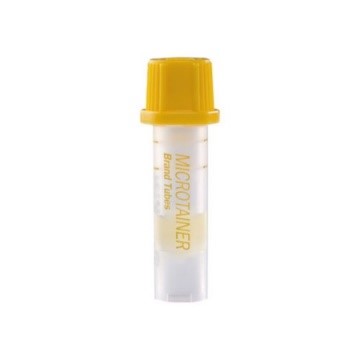
- A small gold-topped tube
- Disinfectant wipes
- Sticking plasters
- A sample collection guide
- Shuttlepouch™
Before you start your test, ensure all these materials are included in your kit.
How do I take my blood sample?
Follow the instructions below to take the best possible blood sample.
1. Wash your hands and clean a flat surface
Wash your hands with soap and warm water. This will ensure no contaminants enter the blood sample when you collect it. Dry your hands with a clean towel.
You may also wish to have access to a flat surface, like a table or a countertop, so you can lay all the test materials out in front of you. This way, everything you need will be at hand.
Collecting blood for this test will be easier if your hands are warm, as it increases blood flow. You may want to try rubbing your hands together, holding your hands close to a heat source, or soaking your hands in a sink of warm water.
2. Lay everything out in front of you
Before collecting your blood sample, ensure you have all the materials in front of you.
Open the gold-topped tube and stand it on its bottom.
3. Disinfect your chosen finger
Open the alcohol swab package and disinfect the finger you intend to use. We recommend using your middle or ring finger of your non-dominant hand.
Wipe your finger dry with a clean tissue. Ensure the finger is completely dry, as blood will not form a drop at the puncture site of a moist finger.
4. Use the lancet
Take one of the three lancets out of the bag. Twist off the top to remove the cap. The lancet will be ready to use.
Hold the end of the lancet to the tip of your finger. When you’re ready, press the lancet firmly into the end of your finger. You will hear a snap and feel a pinch at the lanced site.
5. Let the blood collect
Once you have created a puncture, blood may take a few moments to appear.
Wipe away the first drop with a clean tissue.
Holding your hand or arm downwards, lightly massage the sides of your finger with your other hand. This “milking” process will push the blood to the tip of the finger.
After a few moments, a drop of blood should form at the end of your finger.
6. Let the blood fall into the collection tube
Hold the tip of your lanced finger over the tube’s opening and let the blood drops fall into it. Massage the finger to bring blood to the surface as needed. Don’t squeeze too hard, as this might damage the blood cells in your sample.
Fill the tube to the upper line along the side of the tube.
If the blood ceases to flow and you haven’t filled the tube to the indicated line, lance another finger and repeat the process.
7. Bandage your finger and seal the tube
When you’ve filled the tube to the upper line, bandage your finger with the plaster provided to stop the bleeding. Screw the gold top back onto the tube to seal it.
Gently rotate the tube 5-10 times.
8. Stick the label on the tube
After the tube has been sealed and rotated, stick the appropriate label onto the side of the tube. This label will have your PIN number, initials, and date of birth on it.
Be sure to write the date you collected your sample on the label.
Affix the label to your tube by placing it in the middle of the label and wrapping it around the tube.
It’s important to label your tube. Unlabelled samples can’t be processed.
9. Put the labelled tube into the Shuttlepouch and then into the box
Once you’ve labelled the tube, put it into the protective Shuttlepouch™ and put it in the delivery box.
10. Do a final check
Before you send off your sample, check that you have included the following in the delivery box:
- Your labelled blood collection tube
- Any used or unused lancets
- The Pathology Request Form located inside the return envelope
Once you have ensured that the above items are included in the delivery box, place the box in the envelope, seal it, and post it as soon as possible.
Final thoughts
You should get your results in a few days after you have posted your sample.
If you have any questions about taking your blood sample, call the number at the top of this page and speak to one of our trained Sexual Health Advisors.

Get tested for STIs at home with a Better2Know Home Test Kit.
Categories
- Awards
- Bacterial Vaginosis
- Blood Tests
- Cardiovascular Health
- Cervical Cancer
- Chlamydia
- Condoms
- Covid-19
- Gardnerella
- Genital Warts
- Gonorrhoea
- Health and Wellness
- Hepatitis A
- Hepatitis B
- Hepatitis C
- Herpes
- HIV
- HIV (AIDS)
- Home Testing
- HPV
- Instant Testing
- MSM
- Mycoplasma
- News
- Non-Specific Urethritis
- PAP Smear
- Pre-Pregnancy
- Sexual Health
- STD Symptoms
- STD Tests and Screens
- STI Transmission
- Stigma
- STIs
- Swab Tests
- Syphilis
- Trichomonas
- Ureaplasma
- WSW
- Zika